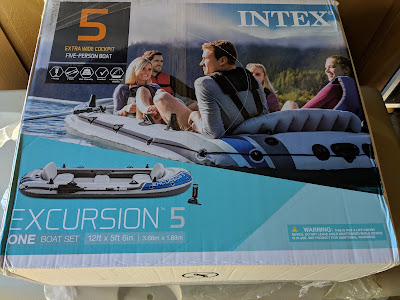
There are TONS of resources on building a floor for the Intex Excursion 5. I watched a lot of videos, read blogs and forums, and reviewed pictures from Amazon reviews to figure out how I wanted to build my floor.
For my floor, one of the key requirements was being able to haul it in the back of a Subaru Outback. That is the car that has our annual pass for the local lake is on, so anything boat related really needs to fit in the back of the car so it can go to the lake. For that reason, a single piece floor wasn't feasible.
Resources:
https://www.youtube.com/watch?v=hkcr2KgMB7Y
https://lanzerdiy.wordpress.com/2018/08/05/intex-excursion-5-floor-mod-with-floor-plan/
https://pumpupboats.com/diy-floor-for-inflatable-boats/
Tools, Parts, and Supplies List:
Supplies and Parts
4'x8' sheet of plywood - I went with a 15/32 inch thickness as I felt it had the best balance between stiffness and weight.
Sandpaper - Make sure it is compatible with your sander!
Water seal - Olympic Waterguard clear wood sealer. Went on in a single coat.
Outdoor carpet - TrafficMaster Ocean blue for my boat. There are plenty of options available, just make sure it is outdoor carpet. The TrafficMaster was easy to work with because it was thin enough to bend easily and had a decent backing.
Self adhesive pipe insulation - Everbilt 1/2 in. x 6 ft. Foam Self Seal Pipe Insulation
Old sheet or clear plastic drop cloth
Staples for staple gun
Carpet adhesive - Roberts 1-7/8 in. x 75 ft. Roll of Max Grip Carpet Installation Tape - After completing this project, I think it could have been done without this item. I explain my reasoning below.
1-inch PVC pipe - I had a lot of this around the house which I used. If I did this project again, I would go with all schedule
1-inch PVC straight couplings- DURA 3/4 in. Schedule 40 PVC Coupling - 10 Pack
1-inch stainless steel bolts, washers, and lock nuts.
Sharpie marker
Tools
Jigsaw - don't forget to make sure you have blades prior to starting
Power Sander
Drill and hole saw
Paint brush - I buy the better quality brushes. If you take care of them and clean them they last a long time.
Staple gun
Carpet knife
Creating the Floor Outline
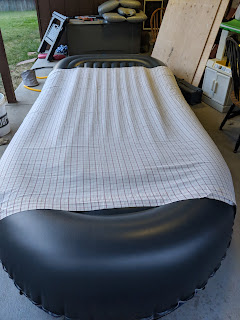
Reading from the resources above and watching Youtube videos, it was suggested that inflating the boat and tracing the floor from the bottom would be a good way to size up the plywood. I chose to accomplish this using an old sheet and a sharpie to trace the floor. I initially tried using a piece of cardboard but found the tracing wasn't easy. The sheet was easier to trace but it is easy to pull it off your line while doing the tracing. It is much easier if you can enlist some help to hold the sheet tight on the opposite side.
The sheet I used wasn't long enough to cover the entire boat. It wasn't a concern for this project as I was planning to have the floor in two separate pieces. I think a piece of plastic drop cloth would have been a better solution if trying to cut a full piece floor. The tracing worked out very well, as you can see below.
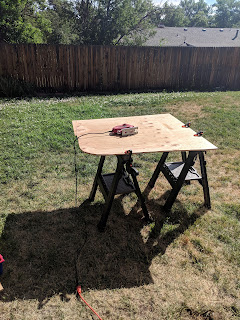
The next step was to transfer the traced patterns to the plywood. I had Home Depot cut my plywood in half at the store so I already had the two pieces I needed. Rather than cut the sheet with the plywood, I decided to transfer the trace to the wood. This is another area where some clear plastic drop cloth would have been a better choice. I could have simply clamped it to the plywood and cut the design on the plastic. Transferring the trace wasn't overly difficult, I just rolled back the sheet and made marks based on the lines I could see through the sheets onto the plywood.
Cutting the Floor
Once the design was transferred, I simply cut inside the line to make my floor pieces. I cut inside the line to allow for some extra room for the pipe insulation to be added later.
Once the first piece was cut out, I sanded it down VERY thoroughly. I took extra time to round off corners and get rid of any splinters. After that, I checked the fit of my first piece. I wrapped the pipe insulation without sticking it to ensure the floor fit how I wanted it. It is worth noting that it is much easier to install the floor after the boat floor is inflated but before inflating the second chamber. Based on the fit test, I made some minor adjustments with the jigsaw and re-sanded those cuts.
After that, it was on to cutting and sanding piece number 2. My goal was to have the space in my floor sit directly under where the center inflatable seat goes. After checking the fit with both pieces, I found that it matched up close enough.
Once I got the fit right, I drilled a hole in the rear piece so I could access the boat floor inflation valve. I'm not sure if this will be needed but it was easier to put in now (Note: I have not yet added this hole to the carpet so thus far I haven't needed it). Next up was water sealing the entire floor, front back and sides. I chose a clear water proofing that would go on in a single coat. Not particular reason I chose that over a primer or paint type application, it was just what I wanted.
Joining the Floor
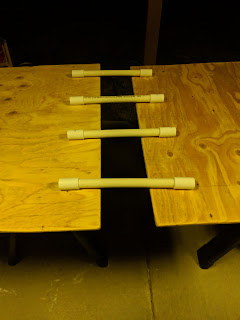
The final piece of the floor assembly was to attach the separate pieces together in a way that added some stiffness while also allowing for them to be taken apart and transported. I chose to do this using pieces of PVC pipe. By fitting the PVC couplings to the bottom of the floor, I could cut 1-inch PVC to length and have the floor fit tight and hopefully not see-saw when in the boat. Also, the PVC could potentially make a good conduit for running any wiring for a trolling motor (someday).
The first thing I did was put the floor in and mark where I wanted the PVC couplings to sit. I used a straight edge to mark each board although in hindsight, snapping a chalk line would likely have been easier. Next, I drilled through the board and couplings , being careful to stay on one side of the coupling so the PVC pipe wouldn't bump into the bolt. Using two stainless steel bolts and lock nuts, I screwed the couplings in place.Next, I placed the boards in the boat upside down so the couplings faced up and the floor sat roughly how I wanted. I then cut the four pieces of PVC to length.
After attaching the PVC pipes I moved onto the pipe insulation. Attaching this was simple and the adhesive on the self Everbuilt was plenty strong. It was difficult to get it around bends and keep it stuck. It might have been easier to cut some separate pieces for shorter straight runs and use a single long piece to go around the curved edges. Ultimately, once the carpet was on, this became a non-issue.
Testing the Floor
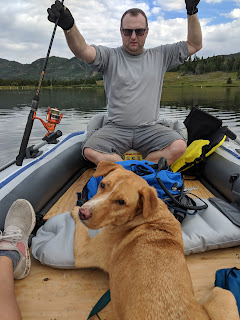
At this point in the process, it was time to test the floor. There was a trip already planned and I ran out of time to install the carpet before departing. As you can see below, the floor gap fit right under the inflatable center seat. The added a lot of stability to the boat and was easily set up and installed with the PVC.
Adding Carpet
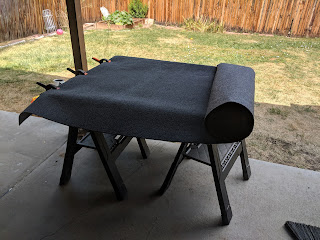
The last step to finish the floor was to add the outdoor carpet. My Home Depot had a wide variety of options but I settled for a blue color. A single 10-foot long piece of TrafficMaster outdoor carpet worked fine. I laid out each piece of the floor and cut the carpet to size for each piece, leaving plenty of overlap.
Once I had each piece cut, I laid out double sided carpet adhesive tape to attach the carpet. I laid the tape all the way up to the pipe insulation, which turned out to not be needed. The way the carpet sits over the insulation means the adhesive there does nothing. My original goal was to attach the carpet without staples but since it did not sit well around the insulation, I ended up having to attach the carpet with staples. Turns out the carpet adhesive was likely a waste of money. The staples did go securely into the plywood and I am comfortable they will hold for a long time. It is definitely something I will need to check in the future though.
